

Introduction
One thing new laser makers learn pretty quickly is that cutting the project is only half the job.
Some links in this article may be affiliate links. If you purchase through them, we may earn a small commission at no extra cost to you. Thanks for supporting our work.
The real personality usually shows up at the finishing table.
A laser-cut design can look clean straight off the machine, especially if the cut settings are dialed in well. But paint, stain, sealing, and small finishing choices are what turn a flat piece of plywood into something that feels handmade, polished, and ready to sell.
If you make layered signs, ornaments, home décor, name plaques, nursery pieces, or small gift products, learning how to paint laser cut wood is one of those skills that pays off immediately.

The tricky part is that there is not one single “right” method.
Some finishes are fast and practical for batch work. Some give better control for tiny pieces. Others are slower but make the wood look warmer and more expensive. I use different approaches depending on the design, material thickness, engraving detail, and how the final piece will be handled.
Here are five painting methods makers actually use for laser cut wood projects.
Table of Contents
How to Paint Laser Cut Wood: Choosing the Right Method

Painting laser cut wood is not just about adding color.
A good finish can:
- Highlight engraved details
- Create contrast between layers
- Improve the perceived value of a project
- Protect the wood surface
- Match a customer’s style or brand colors
- Make simple shapes feel more dimensional
This matters even more with layered designs. A raw plywood project can look flat if every piece is the same tone. Once you start combining painted top layers, stained backgrounds, and engraved details, the design has much more depth.
I also find that finishing exposes the quality of the file itself. A clean SVG with well-separated layers is much easier to paint than a design where every shape is tangled together on one layer.
Method 1: Spray Paint for Laser Cut Wood

Spray paint is one of the most common ways to finish laser-cut wood, especially for layered signs and repeated products.
It gives smooth coverage without visible brush strokes, which is helpful when you are working with thin letters, ornaments, or decorative overlays.
Best For:
- Layered signs
- Home décor
- Ornaments
- Wall art
- Batch production
- Small decorative cutouts
Advantages:
- Fast application
- Smooth surface finish
- Large color selection
- Useful for thin or detailed pieces
- Easier than brushing around tiny shapes
The key is to use several light coats instead of one heavy coat. Heavy paint can soften fine details, fill shallow engraving, or create buildup along the laser-cut edges.
I usually prefer painting individual pieces before assembly when the design allows it. It keeps edges cleaner and avoids that awkward problem where paint collects in corners after the layers are already glued together.
A small warning: spray paint can exaggerate dust and residue. If the wood has smoke marks, loose fibers, or sanding dust, the paint will show it.
Method 2: Acrylic Paint for Laser Cut Wood
Acrylic paint is still one of the most practical choices for laser cut wood because it is affordable, easy to find, and available in almost every color.
Unlike spray paint, acrylics give more control. That makes them useful for small decorative areas, hand-painted accents, and multi-color designs.
Best For:
- Personalized signs
- Small decorative pieces
- Multi-color projects
- Hand-painted accents
- Children’s room décor
- Seasonal ornaments
Advantages:
- Easy to apply
- Beginner-friendly
- Good color variety
- Useful for detail work
- Easy to touch up
Acrylic paint works nicely on many plywood and MDF projects, but the surface still matters. Some woods absorb paint unevenly, especially around engraved areas or exposed end grain.
For crisp results, thin coats are better than thick ones. Thick acrylic can leave brush texture and make small SVG details look less sharp after painting.
For tiny pieces, paint markers or small detail brushes can be easier than a full brush. I use them when a design has small leaves, names, dots, borders, or little decorative elements that would be annoying to mask.
Method 3: Wood Stain for a Natural Look
Not every laser-cut project needs bright color.
Wood stain is a good option when you want the grain to remain visible. It gives the piece a warmer, more natural look while still making it feel finished.
Best For:
- Rustic décor
- Farmhouse signs
- Address plaques
- Wooden gifts
- Natural wood ornaments
- Background layers
Advantages:
- Preserves wood grain
- Adds warmth and depth
- Creates a more premium feel
- Pairs well with painted layers
- Available in many tones
I like stain especially for background panels. A stained base with painted top layers often gives stronger contrast than using paint on every piece.
The main thing to watch is absorption. Laser plywood, birch, basswood, and MDF can all take stain differently. Some sheets stain beautifully. Others look blotchy unless you prep them first.
Engraved areas may also become darker than expected because they absorb more finish. That can be useful if you want contrast, but it can also make fine engraving look muddy if the design is already very detailed.
Method 4: Paint Before Cutting
Painting the wood before cutting can save a lot of time, especially when you are producing multiples of the same project.
Instead of cutting first and then painting dozens of small parts, you paint the sheet, let it dry fully, mask if needed, and then cut the finished material.
Advantages:
- Faster production workflow
- Cleaner color coverage
- Useful for batch projects
- Less handling of tiny pieces
- Easier for repeated designs
This method can be efficient, but it needs testing.
Painted sheets can create more smoke during cutting, and the edges will still darken from the laser. On some designs, that dark edge looks nice. On others, especially light colors, it can be distracting.
You also need to make sure the paint is fully dry before cutting. Paint that feels dry on the surface may still be soft underneath, and that can lead to residue, marks, or unpleasant cutting behavior.
I would not start with a full sheet. Test a small sample first, using the same wood, paint, masking, and laser settings you plan to use for the final project.
Method 5: Color Fill for Laser Engraved Projects
Color fill is one of the most satisfying finishing techniques for engraved laser projects.
Instead of painting the whole piece, you add paint into the engraved areas so the design stands out against the surface.
Best For:
- Logos
- Business signs
- Name plaques
- Personalized gifts
- Detailed engravings
- Decorative lettering
How It Works:
- Engrave the design.
- Apply paint into the engraved areas.
- Remove excess paint from the surface.
- Let the paint dry completely.
- Seal the piece if needed.
The cleanest color fill usually starts before engraving. Masking the surface can make cleanup much easier because excess paint stays on the masking instead of soaking into the wood.
Depth matters too. If the engraving is too shallow, the paint has nowhere to sit. If it is too deep or burned too heavily, the edges can look rough. A good engraving layer should be deep enough to hold color but still clean around the vector paths.
This is where file preparation matters. Thin fonts, tiny details, and overly complex engravings can be difficult to fill neatly, especially on soft wood.
How to Paint Layered Laser Cut Projects
Layered projects are some of the most popular laser cutting designs, but they can become messy if you paint them in the wrong order.
My usual workflow looks like this:
Step 1: Cut All Layers
Cut the full design first and keep the pieces organized. If the SVG has clear layer names, this part is much easier.
Step 2: Sand or Clean the Surface
Remove dust, soot, and loose fibers. Even a quick wipe can improve paint adhesion.
Step 3: Paint or Stain Pieces Separately
This usually gives cleaner results than painting after assembly. It also lets you use different colors without complicated masking.
Step 4: Let Everything Dry Fully
Do not rush this part. Paint can feel dry but still dent, smear, or stick when pressure is applied.
Step 5: Assemble the Design
Once the finish is dry, glue the layers together carefully. Dry-fitting before glue helps catch alignment issues early.
Painting before assembly usually creates sharper edges and a more professional finish. It also prevents glue from blocking paint in small corners.
Should You Seal Laser Cut Wood?
For decorative pieces that will sit on a shelf, sealing may not always be necessary.
For signs, ornaments, keychains, handled gifts, or anything displayed near moisture, a protective topcoat is usually a good idea.
Popular options include:
- Clear polyurethane
- Spray sealers
- Protective topcoats
- Wood finishing waxes
A sealer can help protect the color, reduce scratches, and make the project feel more complete.
Just be careful with heavy topcoats on engraved details. Too much finish can pool inside fine lines and soften the look of the engraving.
Common Painting Mistakes to Avoid
Applying Too Much Paint
Heavy coats can fill engraved details, soften sharp edges, and make thin laser-cut pieces look bulky.
Skipping Surface Preparation
Smoke residue, dust, and loose fibers can stop paint from bonding cleanly.
Assembling Too Early
Paint that is not fully cured can stick, peel, or leave marks when layers are pressed together.
Ignoring Test Pieces
Different woods absorb paint and stain differently. A small test piece can save a full sheet of material.
Forgetting About Kerf and Edge Darkness
Paint changes the surface, but it does not remove the laser-darkened edge. Sometimes that edge adds contrast. Sometimes it needs sanding, sealing, or a design adjustment.
Using Ready-Made Laser Cut Files
One thing I notice often is that finishing becomes much easier when the laser cut file is designed properly from the beginning.
Clean SVG files, separated layers, sensible cut lines, and organized engraving sections make painting less frustrating. A design may look beautiful in a preview image, but if the layers are confusing or the tiny details are too fragile, the finishing process becomes harder than it needs to be.
When I'm looking for inspiration or production-ready designs, I usually pay attention to how well the layers are organized rather than how impressive the preview image looks. A well-built SVG can save a surprising amount of time during cutting, painting, and assembly.
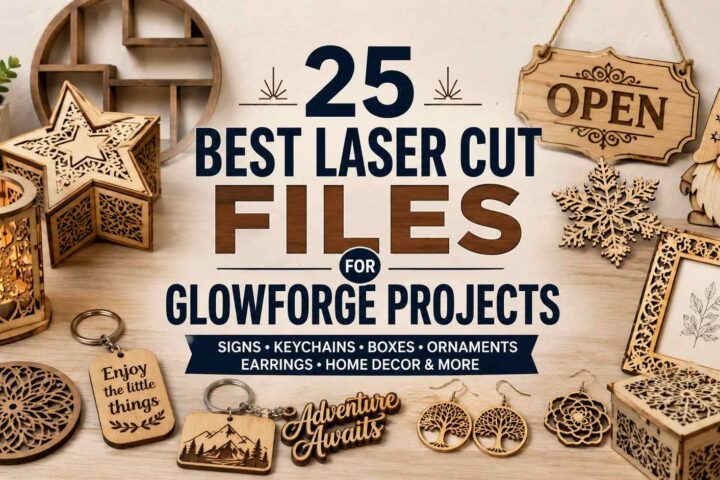
For makers who don't want to design everything from scratch, platforms like Creative Fabrica offer large collections of laser-ready SVG files, layered signs, ornaments, home décor projects, and engraving designs. Many of these files are already structured for multi-layer assembly, which can make painting individual components much more straightforward.
Whether you're experimenting with spray paint, stain, or color-fill techniques, starting with a clean file often has just as much impact on the final result as the finishing method itself.
Once you master the art of painting laser-cut wood, you'll be able to create stunning custom pieces, perhaps even exploring creative ideas like those found in Laser Cut House Numbers: 12 Modern Address Sign Ideas.
Final Thoughts

Learning how to paint laser cut wood can completely change the way your projects look.
Spray paint is useful for speed. Acrylic paint gives control. Stain keeps the natural wood feel. Pre-painted sheets can save time in production. Color fill makes engraved details stand out.
Most makers eventually mix several methods.
That is where the fun starts.
A stained background, painted lettering, engraved color fill, and a light protective seal can turn a simple laser-cut design into something that feels much more finished. You do not need expensive equipment to get there. You need patience, test pieces, clean files, and a willingness to experiment before committing to the final project.
Frequently Asked Questions
What is the best paint for laser cut wood?
Spray paint and acrylic paint are two of the most popular options. Spray paint gives smooth coverage, while acrylic paint gives more control for small details and multi-color designs.
Should I paint laser cut wood before or after cutting?
Both methods can work. Painting after cutting gives more control over individual pieces, while painting before cutting can save time for batch production. Always test first, especially if you are cutting painted sheets.
How do you paint small laser cut pieces?
Small pieces are usually easiest to paint with spray paint, paint markers, or fine detail brushes. Painting them before assembly helps keep edges cleaner.
What is color fill in laser engraving?
Color fill is a finishing method where paint is added into engraved areas to create contrast. It is often used for logos, lettering, signs, and personalized gifts.
Do I need to seal painted laser cut wood?
Sealing is recommended for projects that will be handled often, displayed outdoors, or exposed to moisture. A clear spray sealer, polyurethane, or protective topcoat can help preserve the finish.


Follow Us